

What is a provisioning token?
A provisioning token is a signed JWT that proves to the Origin backend that an agent installation is authorized to register under your tenant. Think of it as the agent’s enrollment credential. You supply it once during installation — interactively when running the installer manually, or silently when deploying via MDM. After the agent has registered, the token is no longer needed for that endpoint’s ongoing operation.One token can register several endpoints, but not unlimited ones. Each token carries a use limit and an expiry — see below. Many organizations create one token per deployment wave so a batch can be revoked independently.
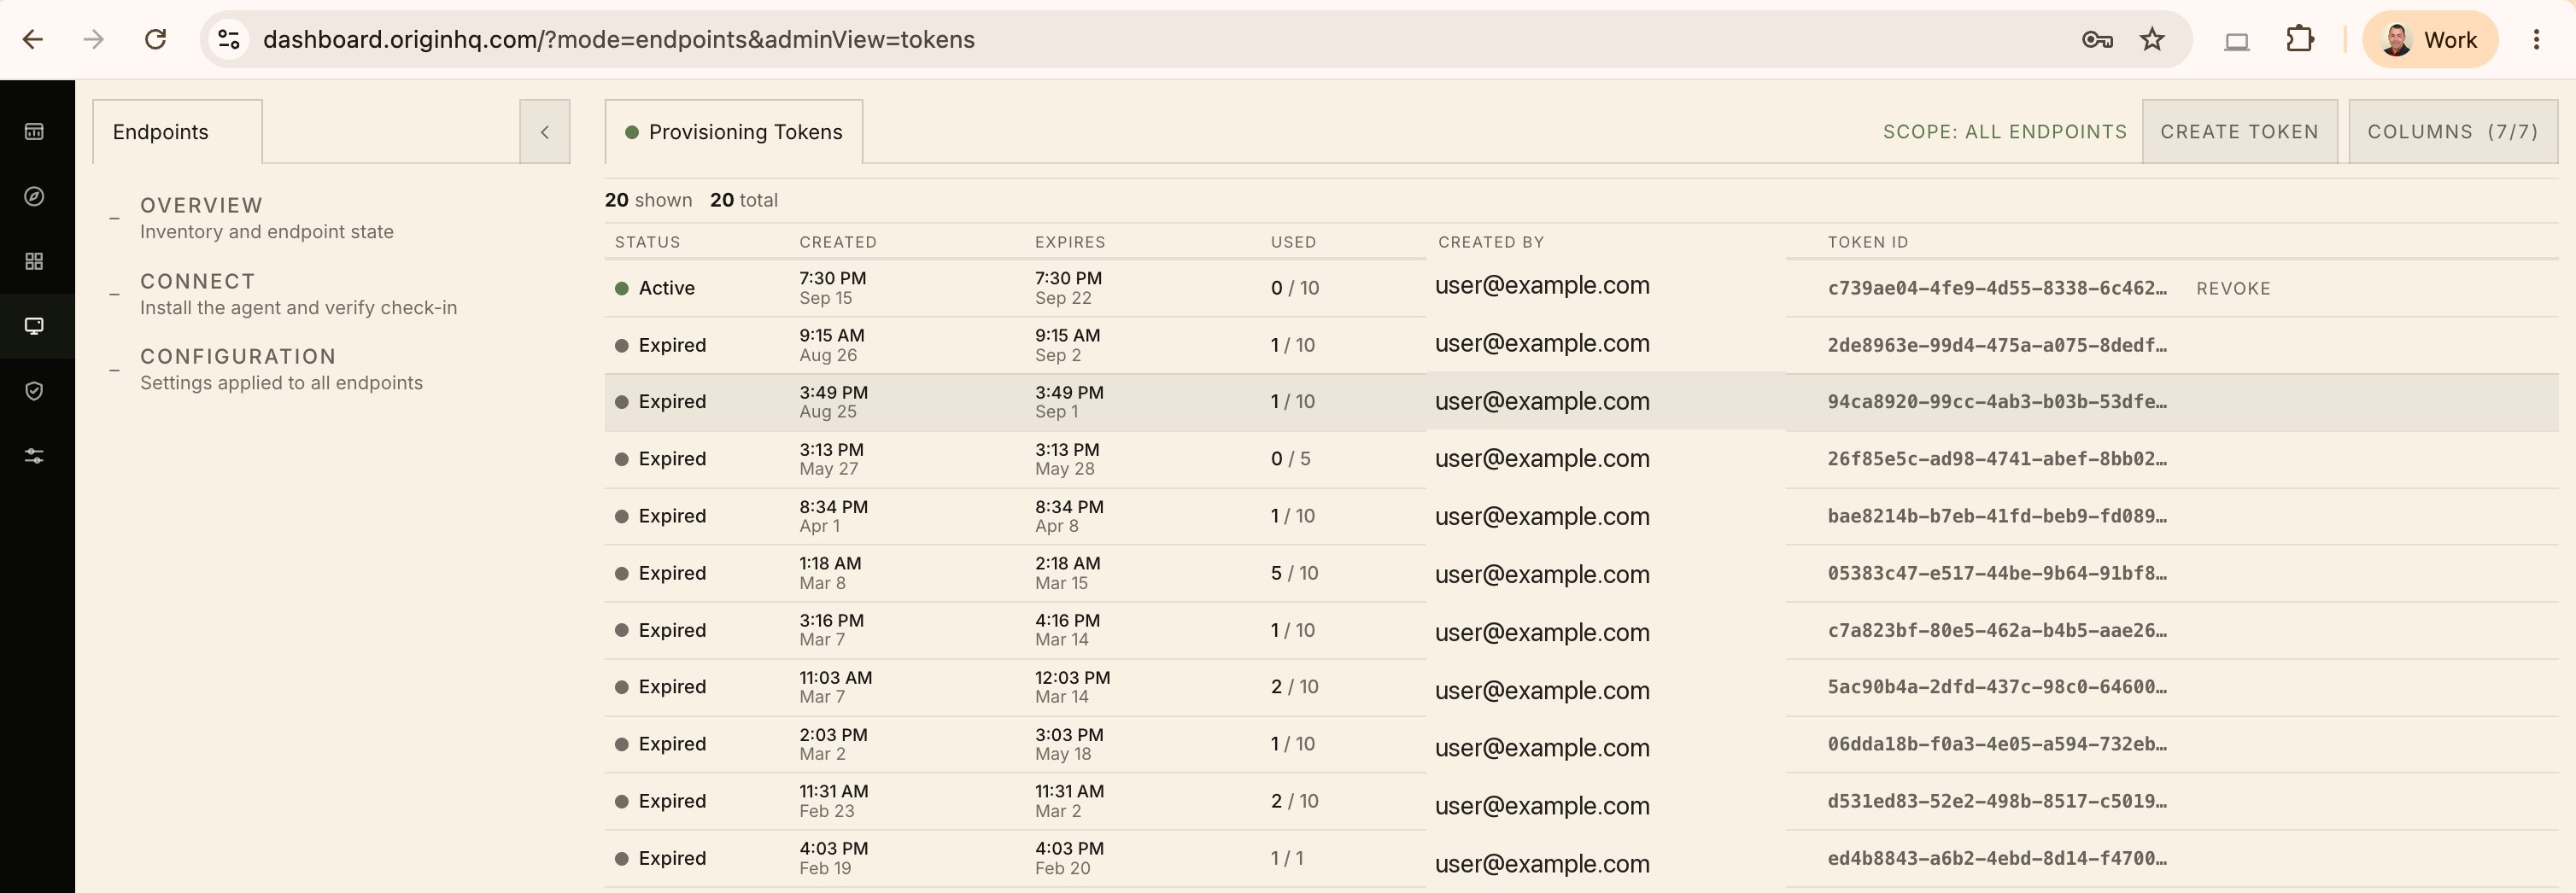
The token list
Use Columns to change which columns are visible, and the search box to filter the list.
Creating a token
1
Open Endpoints
Sign in at dashboard.originhq.com and click Endpoints in the far-left rail.
2
Navigate to Connect → Tokens
Select Connect, then click Tokens in the top-right of the panel.
3
Create the token
Click Create Token.
4
Copy and securely store the token
Copy the token value as soon as it appears and store it in your organization’s secrets manager, MDM configuration store, or credential vault.
Using the token during installation
How you supply the token depends on your deployment method.Manual installation
When you run the installer interactively on a macOS or Windows endpoint, the installer prompts you for the provisioning token. Paste the value you copied from the console and complete the installation.MDM deployment
For large-scale deployments, your MDM injects the token silently as part of the install script or configuration profile.- Windows — passed as an MSI property:
PROVISIONING_JWT=<your-token> - macOS — staged to a file the package’s postinstall reads, so no user interaction is required
msiexec syntax.
Revoking a token
Find the token in the list and click Revoke on its row. The token is invalidated immediately and can no longer register new endpoints. Revoked tokens remain in the list with aRevoked status for audit purposes.
Revoking a token does not disconnect or deregister endpoints that already registered with it. It only prevents the token from being used to register new endpoints. Existing enrolled endpoints continue to report telemetry normally.
Security best practices
- Do not commit tokens to source control. Even in private repositories, secrets in version history are a common source of credential leaks. Use environment variables or a secrets manager.
- Scope tokens per deployment wave so you can revoke one batch without disrupting others.
- Limit distribution. Store the value in your MDM’s secure parameter store rather than in plain-text scripts.
- Revoke tokens you no longer need, rather than letting them sit until expiry.
- Watch the
used / limitcount on tokens backing an active rollout, so you notice before a wave starts failing.