Deploy the Origin macOS Agent Silently via Tanium MDM
Use Tanium Device Management and Tanium Deploy to push the Origin macOS agent fleet-wide with fully automated, zero-touch installation.
A step-by-step walkthrough for silent deployment of the Origin macOS agent — configuration profile, install script, and end-to-end Tanium deployment flow.
Deploying the Origin agent on macOS requires two Tanium products working in sequence:
Tanium Device Management pushes the MDM configuration profile that pre-approves the system permission the agent needs. Without this profile, the agent will hit an interactive Full Disk Access dialog on first run and silent install will fail.
Tanium Deploy stages the provisioning JWT and executes the installer, but only on endpoints where the profile has successfully installed.
The two products are independent — Device Management uses Apple’s MDM/APNs channel, and Deploy uses the Tanium Client. Both must be in place on the endpoint before the agent install runs.
The privacy configuration profile must reach Installed status on the endpoint before the Deploy package runs. The Deploy deployment is gated on this via a computer group (Step 5) — it will not run on a Mac until the profile is confirmed installed.
Macs must be enrolled in Tanium Device Management before profiles can be pushed. Device Management enrollment also automatically installs the Tanium Client, which Deploy requires.
If your Macs are purchased through Apple Business Manager (ABM) or Apple School Manager (ASM), configure automated device enrollment so Macs enroll into Tanium Device Management at setup time with no user interaction required.
Go to Shared Services → Device Management → Settings (GEAR icon, not the side menu) → Automated Enrollment
Follow the prompts to link your ABM/ASM token and configure the enrollment experience
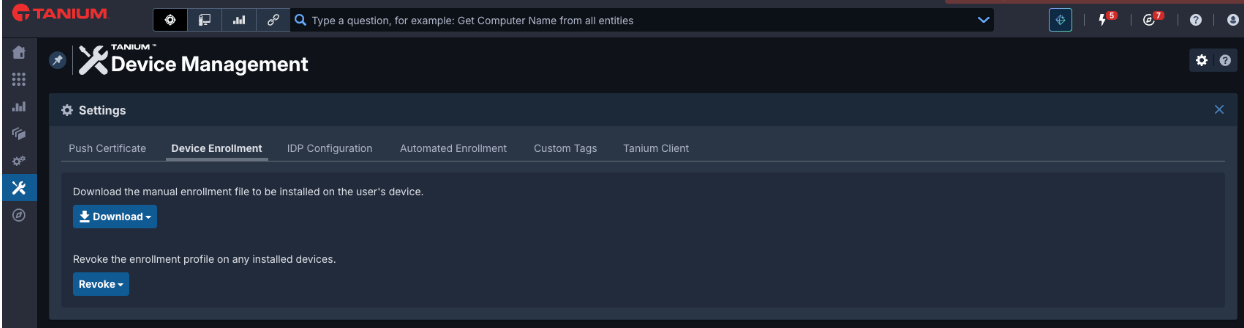
For individual Macs not in ABM, download and install the enrollment profile manually:
Go to Shared Services → Device Management → Settings (GEAR icon, not the side menu) → Device Enrollment
In the Manual Enrollment section, click Download and select the macOS enrollment file
Copy the profile to the target Mac and install it
On the Mac, open the profile in System Settings and confirm installation
Once enrolled, the Tanium Client installs automatically. Verify enrollment by checking that the Mac appears in Shared Services → Device Management with a recent check-in time.Alternatively, you can ask the question:
Get Computer Name and Device Management - Last Check-In Time and Device Management - Device ID from all entities with ( Is Mac equals true and Device Management - Device ID matches "^[\da-f]{8}-.*$" )
Step 2 — Prepare and Upload the Configuration Profile
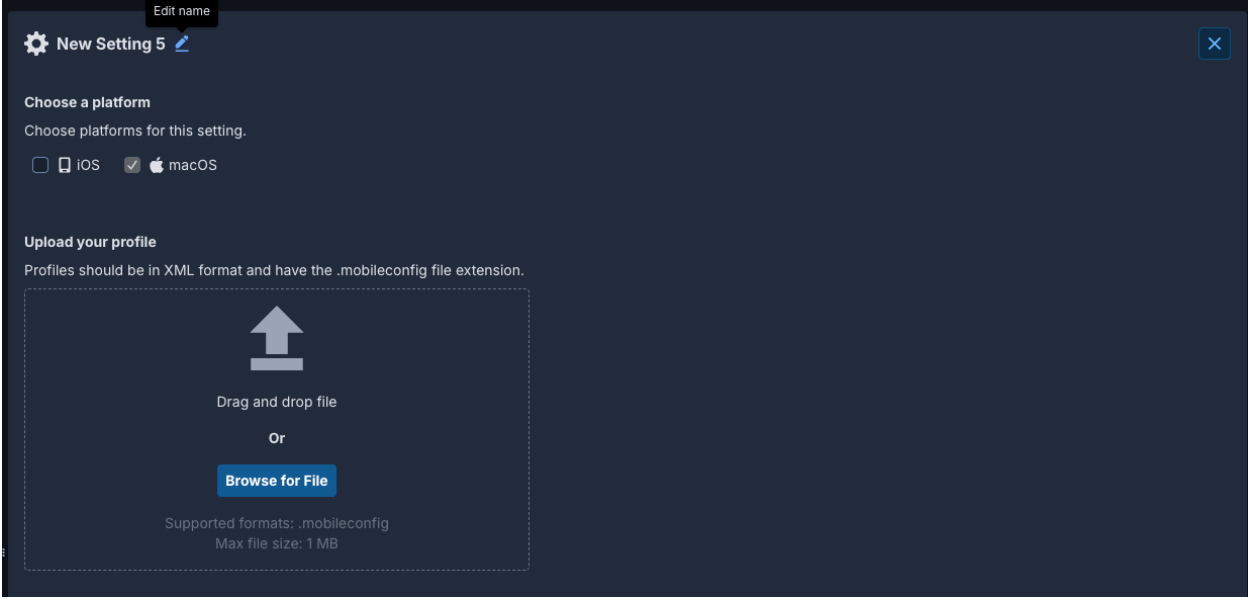
The privacy profile is uploaded as a Custom Setting in Tanium Device Management. Device Management pushes it via the MDM/APNs channel — no Tanium Enforce payload editors are used.
Do not recreate this profile using Tanium Enforce’s built-in payload editors. The editors rewrite the XML and could break the code requirement in the PPPC profile. Upload the raw .mobileconfig file only.
A Device Management collection targets the setting to the appropriate devices.
Go to Shared Services → Device Management → Collections
Click Add Collection
Name the collection Origin Agent - Profiles
Click Add for the Origin - Privacy setting and click Next
Skip the Applications step and click Next
Configure targeting — select the computer group containing your target Macs
Click Preview Targeted Endpoints to verify scope, then Save
Allow a few minutes for the profile to push via MDM. Monitor progress on the collection’s Overview tab — the setting should reach Installed before proceeding to Step 5.
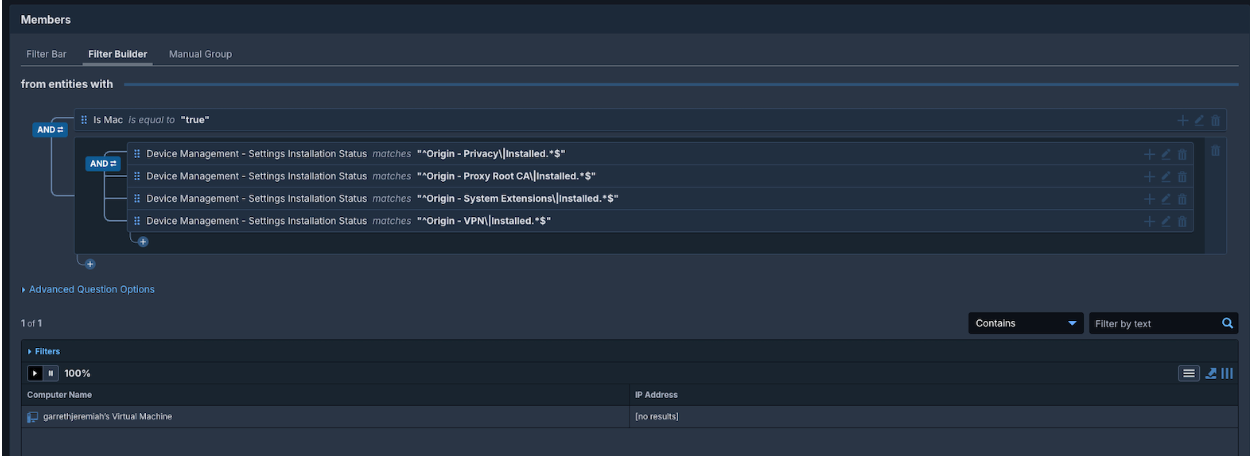
The Deploy deployment is scoped to this computer group. A Mac joins the group only when the Origin privacy profile is confirmed installed — this is the gate that prevents the Deploy package from running on unprepared endpoints.
Go to Administration → Computer Groups
Click New Computer Group
Name it Origin Profiles Installed
Set the filter expression to:
( Is Mac equals true and Device Management - Settings Installation Status matches "^Origin - Privacy\s*\|\s*Installed.*$")
Click Preview to confirm your test Mac appears in the group
Click Save
How the regex works: The condition matches a row in the sensor output that begins with the profile name Origin - Privacy, followed by a pipe delimiter (with optional whitespace), followed by Installed. This ensures both the profile name and its status are confirmed together — a condition like contains "Installed" alone would match any profile that happens to be installed, not the specific one named.
jwt.txt — a plain text file containing your provisioning JWT (just the token string, no newline)
jwt.txt is uploaded as a package file so Deploy distributes it to the endpoint before any commands run. The JWT never appears in the command body and is therefore not visible to admins browsing package details.
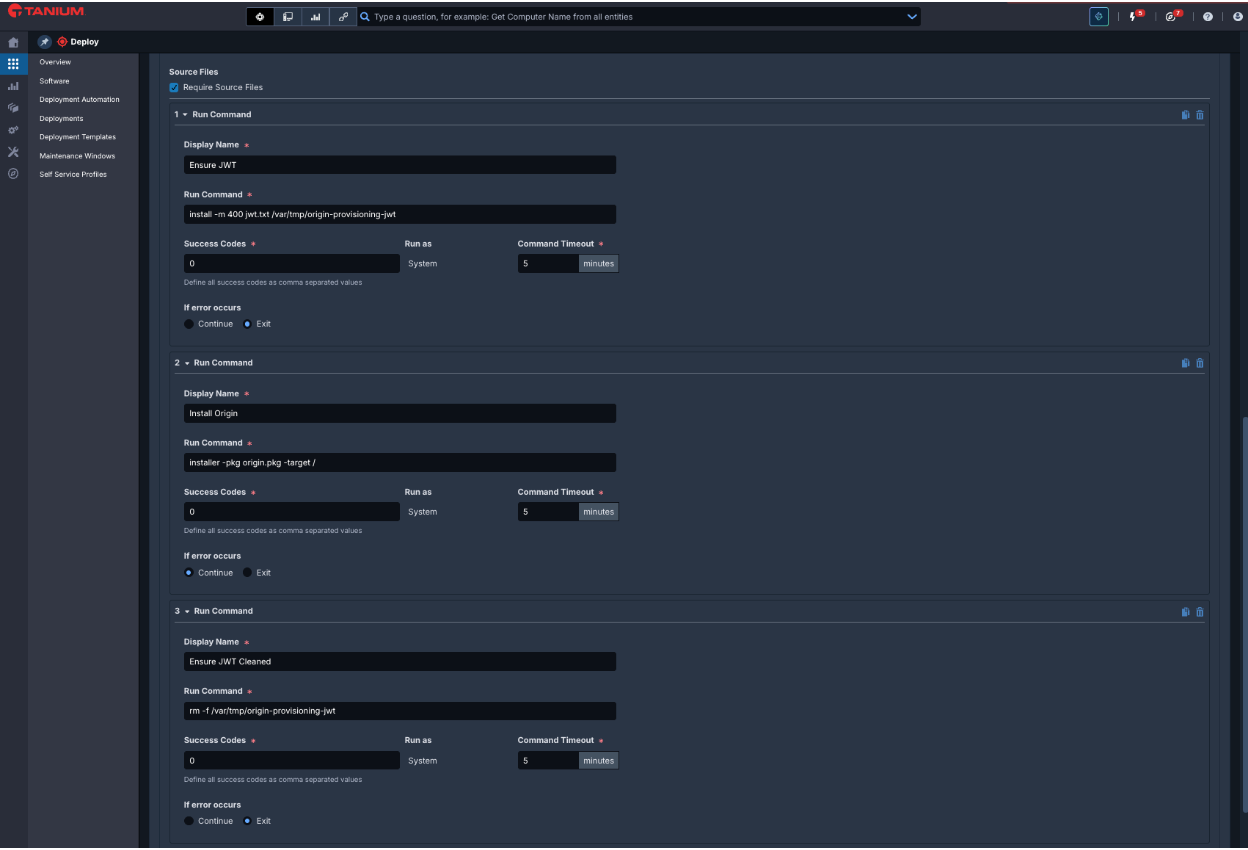
This copies jwt.txt to the path the postinstall expects, with permissions set to read-only by owner (root/SYSTEM). Success code: 0.Command 2 — Install Origin
installer -pkg Origin.pkg -target /
Success code: 0.Command 3 — Clean up the JWT
rm -f /var/tmp/origin-provisioning-jwt
Success code: 0.If Command 1 or 2 fails, Deploy will not proceed to the next command. The cleanup in Command 3 also runs on success — if the installer itself fails and leaves the JWT file behind, note that the file has mode 400 (root read-only) so it is not readable by other processes.
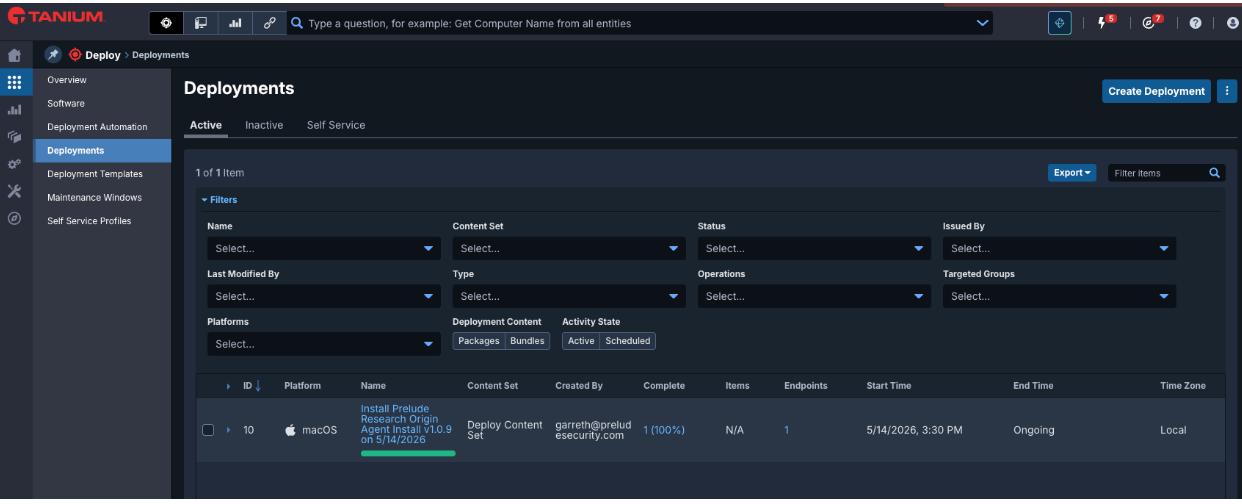
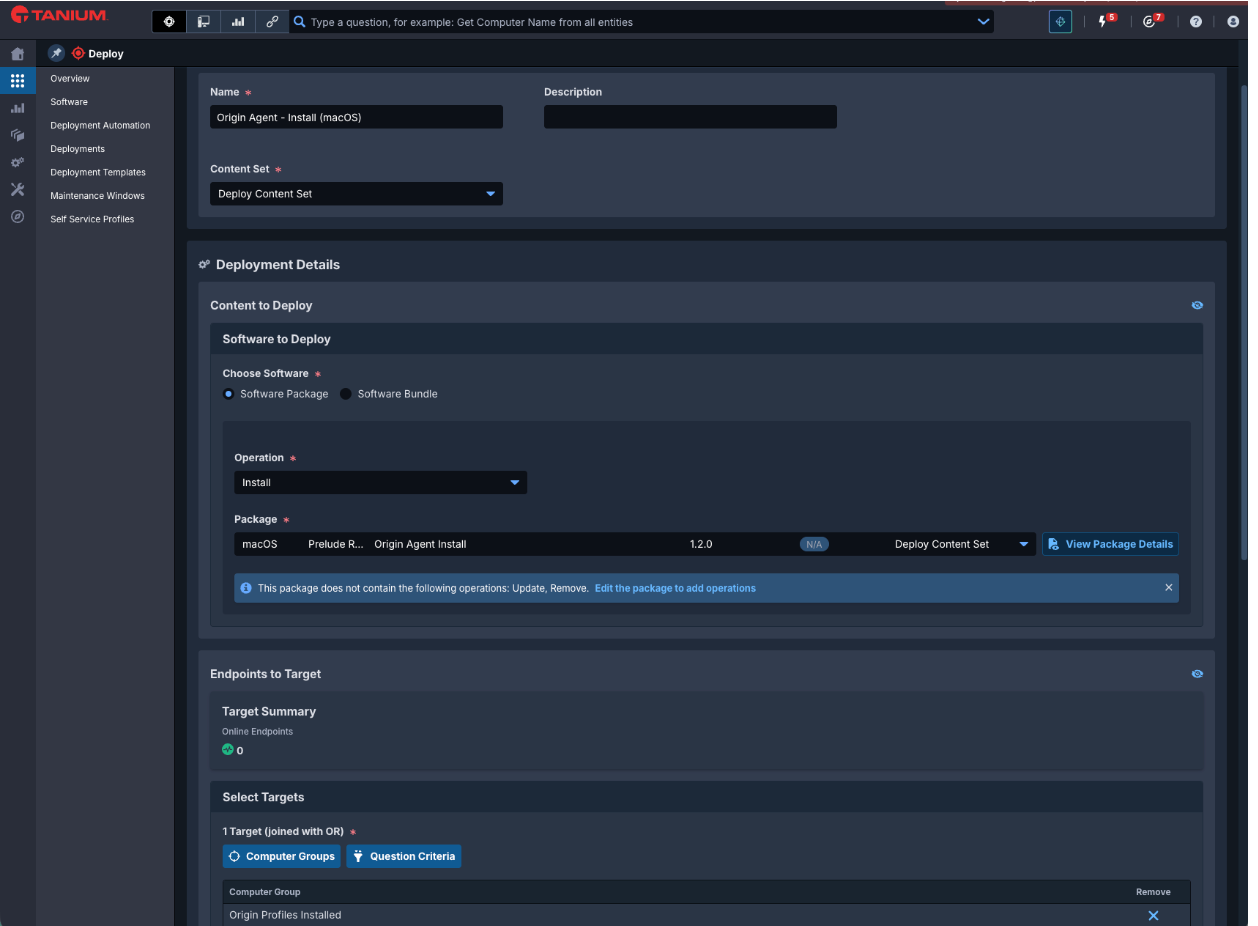
Go to Modules → Deploy → Deployments and click New Deployment
Select Software Package and choose Origin Agent - Install (macOS)
Select Install as the operation
In Endpoints to Target, select the Origin Profiles Installed computer group
Set Deployment Type to Ongoing — this ensures newly enrolled Macs automatically receive the agent once their profile reaches Installed status
Configure a maintenance window if required by your change management policy
Click Deploy
The ongoing deployment plus the dynamic computer group makes this fully zero-touch for new Macs going forward. A Mac enrolls in Device Management → the profile pushes via MDM → the profile reaches Installed → the Mac joins the Origin Profiles Installed group → Deploy fires automatically.
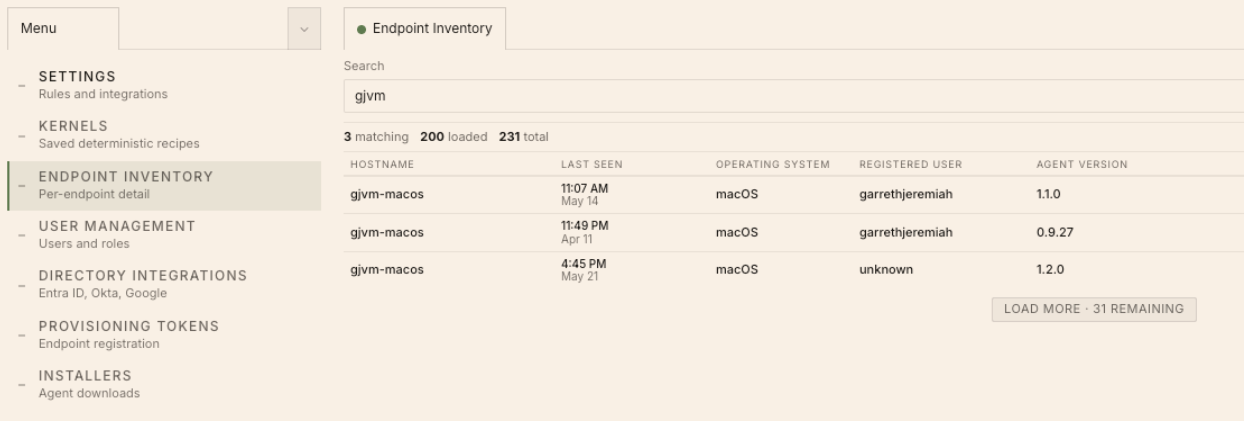
In the Origin console, click Computers and search for the target hostname. A successfully registered endpoint will appear with a recent snapshot time and its detected AI agents populated.
Profile shows Failed or Pending in Device Management
Check the setting status on the collection’s Devices tab.
AllowedTeamIdentifiers conflict — the profile XML was modified or recreated using a payload editor. Re-upload the raw .mobileconfig from the deployment package.
Profile stuck Pending — trigger an MDM check-in from the device’s Endpoint Details page using Deploy Action → Refresh Device Data, or wait for the next scheduled check-in.
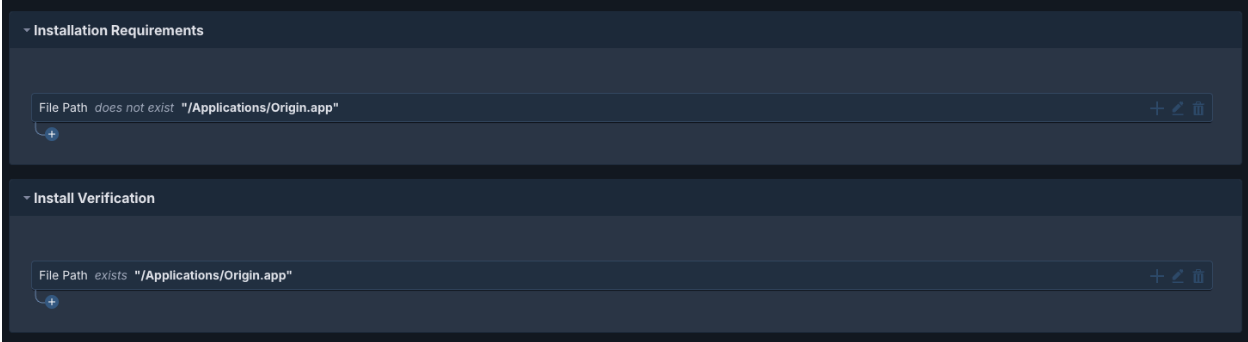
The Installation Requirements rule (/Applications/Origin.app does not exist) is evaluating as not met — meaning Origin is already installed on the endpoint. Check the endpoint in the Origin console to confirm whether it is already registered.
Obtain the new JWT from the Origin console under Endpoints → Connect
Create a new jwt.txt containing the new token
Edit the Deploy package — replace jwt.txt in Package Files and increment the version
Existing registered agents are not affected — they maintain their own session credentials after initial registration. Only endpoints receiving a fresh install will use the updated JWT.
Tanium Mac Device Enrollment is deprecated as of December 2025 and sunsets September 2026. If your environment currently uses Mac Device Enrollment, migrate to Tanium Device Management before implementing this guide. See the Tanium Endpoint Management for Mobile User Guide for migration steps.
⌘I
Assistant
Responses are generated using AI and may contain mistakes.


 Once enrolled, the Tanium Client installs automatically. Verify enrollment by checking that the Mac appears in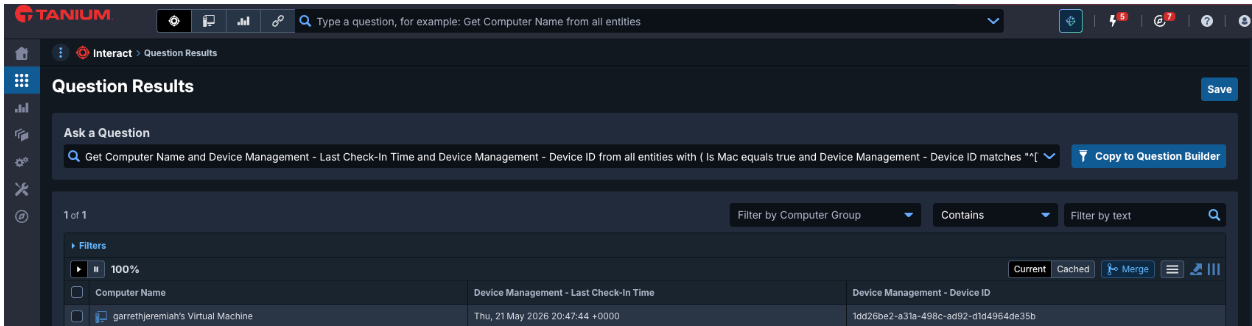
 How the regex works: The condition matches a row in the sensor output that begins with the profile name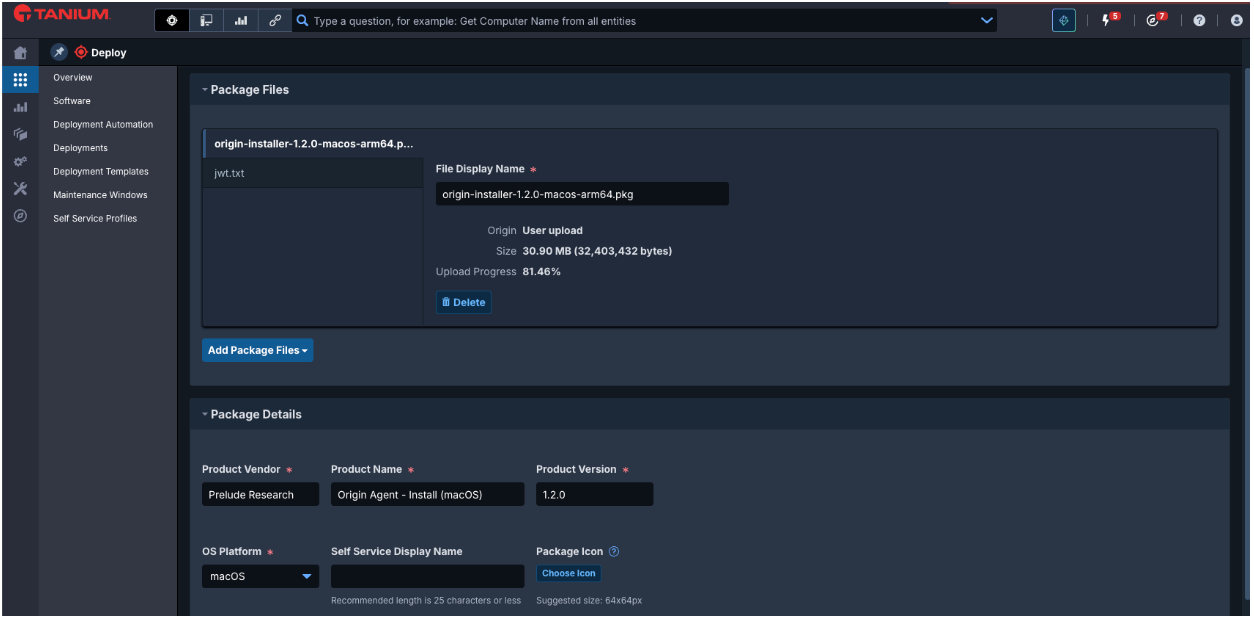
 The ongoing deployment plus the dynamic computer group makes this fully zero-touch for new Macs going forward. A Mac enrolls in Device Management → the profile pushes via MDM → the profile reaches Installed → the Mac joins the