

- A macOS host you can sign in to as an admin.
- The Origin agent
.pkginstaller for your tenant. - The JWT provisioning token from your Origin dashboard.
Where to get the installer and tokenBoth live in the Origin dashboard under Endpoints → Connect. Download the latest
.pkg and copy the JWT to your clipboard before you start.Step 1 — Launch the installer
Double-click the.pkg you downloaded. macOS opens the standard Installer app.
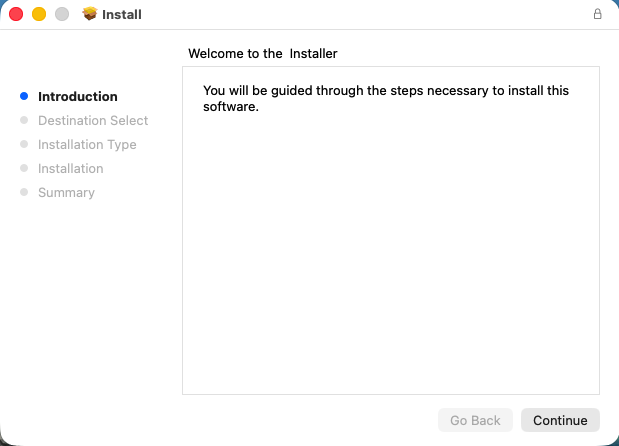 Click Continue.
Step 2 — Confirm the install location
The installer shows the disk it will install to (typically Macintosh HD) and the disk-space footprint (~89 MB).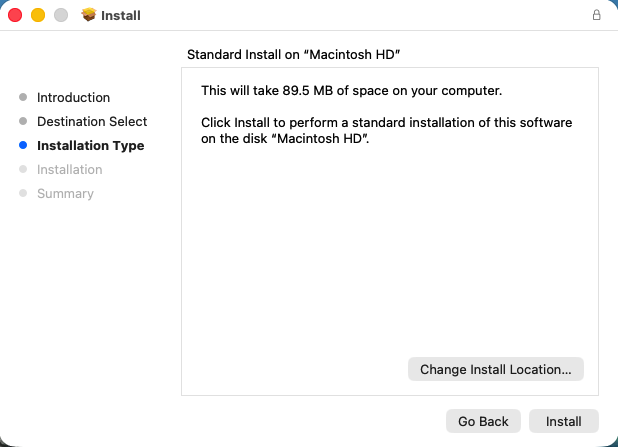 Click Install.
Step 3 — Authenticate to install
macOS prompts for your admin password to allow the installer to write to system locations.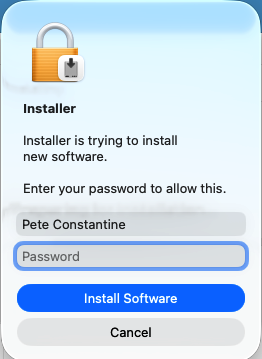 Enter your password and click Install Software.
Step 4 — Paste the registration token
After the package extracts, the Origin Agent Registration dialog appears. Paste the JWT provisioning token you copied from the dashboard.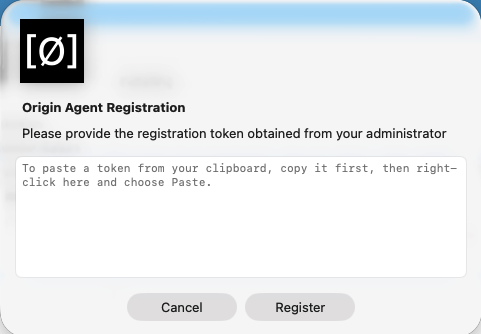 Click Register.
Step 5 — Allow the installer to control System Events
The installer needs to drive System Events to finish wiring the agent into the OS so it launches and stays running at login.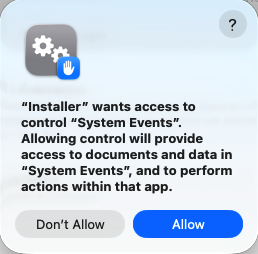 Click Allow.
Step 6 — Grant Full Disk Access
The agent prompts you to grant Full Disk Access so it can read application logs and detect AI tooling installed in user-scoped locations.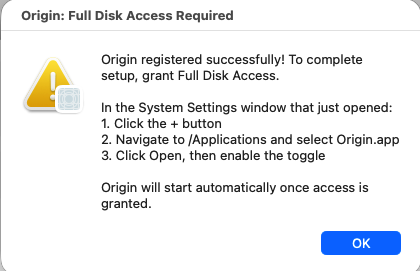 Click OK. macOS opens System Settings → Privacy & Security → Full Disk Access.
- Click the + button at the bottom of the list.
- Navigate to
/Applicationsand select Origin.app. - Click Open, then toggle the row on.
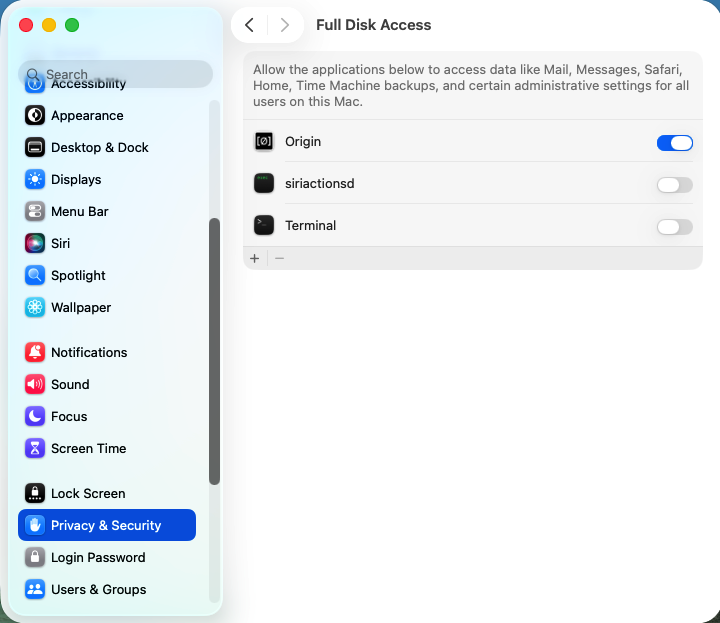 The agent will start automatically as soon as the toggle flips on.
Step 7 — Confirm background activity
macOS posts a notification confirming the agent is allowed to run in the background at login and startup.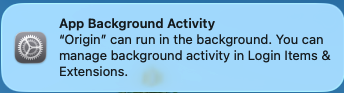 You’re done. The agent is now reporting in. Check the Origin dashboard — the host should appear in the Endpoint Explorer within a minute.